Google Friend Connect

Search This Blog

Monday, March 28, 2011

Droopy Daisies

***UPDATE*** Brand Castle was immediately in contact with me.  They are sending us a new kit to try.  I'll let you know how the new one turns out!


For my Princess' birthday, I had impulsively picked up a packaged cookie mix.  The planets didn't align correctly and they didn't get made then.  That was rectified today.

To be honest, I hadn't expected much from the cute little box.  I figured the cookie cutter that was included would be the real prize.  Let's just say I was glad I hadn't set myself up for failure.

This is the package. Ultra cute and definitely eye-catching. 

This is what I found in the package.  Fair enough.

This ingenious little device is the key to the whole operation.  Use this side to cut out 20 cookies.

Then use this side on half of the cookies to create the tops of the daisy sandwiches.  This is sturdy enough to keep and use again.  We will be exercising that option at our house.

This is about 4 tablespoons of butter, in my estimation.  I had to nuke it a bit.  Somewhere along the line, spring has gotten lost on its way to my house and things are a bit chilly.

You also need to add flour and water.

And, of course, the cookie mix.  Until today, I had never used a mix that required the addition of flour.  A little peculiar, I must admit.

Now, here is where things got a little off kilter.  The side of the box reads as such:

The back of the box, where the actual instructions are found, read as such:
It's a little tough to read here, but they clearly state to add egg along with the butter, water, and flour.

So, I had a peek at the ingredients.  Looks like the egg is already in there.  I vetoed adding more egg.


It comes together to form a ball not unlike a sugar cookie.  Flour (and lots of it) is needed to keep the mixture from sticking to either the rolling pin or the counter.

Or sticking to the baby.  Never let the cookie mix stick to the baby.


I probably could have squeezed one or two more cookies out of this mix, but the kids were having too much fun plastering themselves with it for me to take it from them.  The directions call for a greased cookie sheet, but I found parchment worked just as well.  Used multiple times parchment, of course.  No need to throw it out after just one use.

I did find it took a bit of practise to get the top cookies cut so they were centred properly.  I accept complete and total blame for this inadequacy.  A ruler has always been my best friend.


I turned the oven on to pre-heat to 350 F while the cookies chilled out in the freezer for ten minutes.  The directions were a little off on this point as well.  It had originally called for beginning the oven pre-heat back when you started mixing up the cookies.  In our house, that was a good half hour ago.

When the cookies came out of the oven, the uneven texture was a little suspect.  But we soldiered on.

I whipped up the butter and icing sugar as directed.  The package actually lists powdered sugar, but my Canuck grocery stores don't carry such an animal.

Once the icing mix and some milk are added - watch out.  The colour is enough to make any tiara wearing princess do backflips.

Then, ice away.

Sandwich them together and voila!  Lemon (sorta) flavoured daisy shaped sandwich cookies with an oddly raspberry-ish flavoured neon pink icing.

The end verdict?  The kids don't like the taste of the cookies.  E1 barely took a bite, E2 nibbled at the icing, and E3 fed his to the dog.  The red food colouring still comes through as bitter, the cookie texture is just weird, and the things just taste artificial.

I wouldn't call it a total loss, though.  I did not expect gourmet cookies here.  I expected to spend time with the kids.  And we did spend time together.


All in all, a pretty gosh darn good afternoon.  The whole kit cost us about $5 at HomeSense.  I'm not sure I'd buy another one, but I'm certain I've spent more than five bucks entertaining my children with less satisfying results.

Here is the company's website.  They make a number of ingenious kits for all sorts of occasions. 

I'm going to forward my thoughts on our experiment to the company.  I'll let you know what (if anything) they have to say. 1. 2.
Share/Save/Bookmark 3.

Thursday, March 24, 2011

A Multicultural Experience

Almost a decade ago, shortly after we were married, Goose and I went to visit some friends over in Holland, Michigan.  These friends always had been and continue to be dear to us.  Heck, they even stood in our wedding!  And let us borrow two out of three of their boys to be our ring bearers and let their incredible cuteness take some of the spotlight off of us.  Now that their four progeny are all in school, mom has actually gotten in touch with her fantastically crafty side.  Be sure to check it out here.

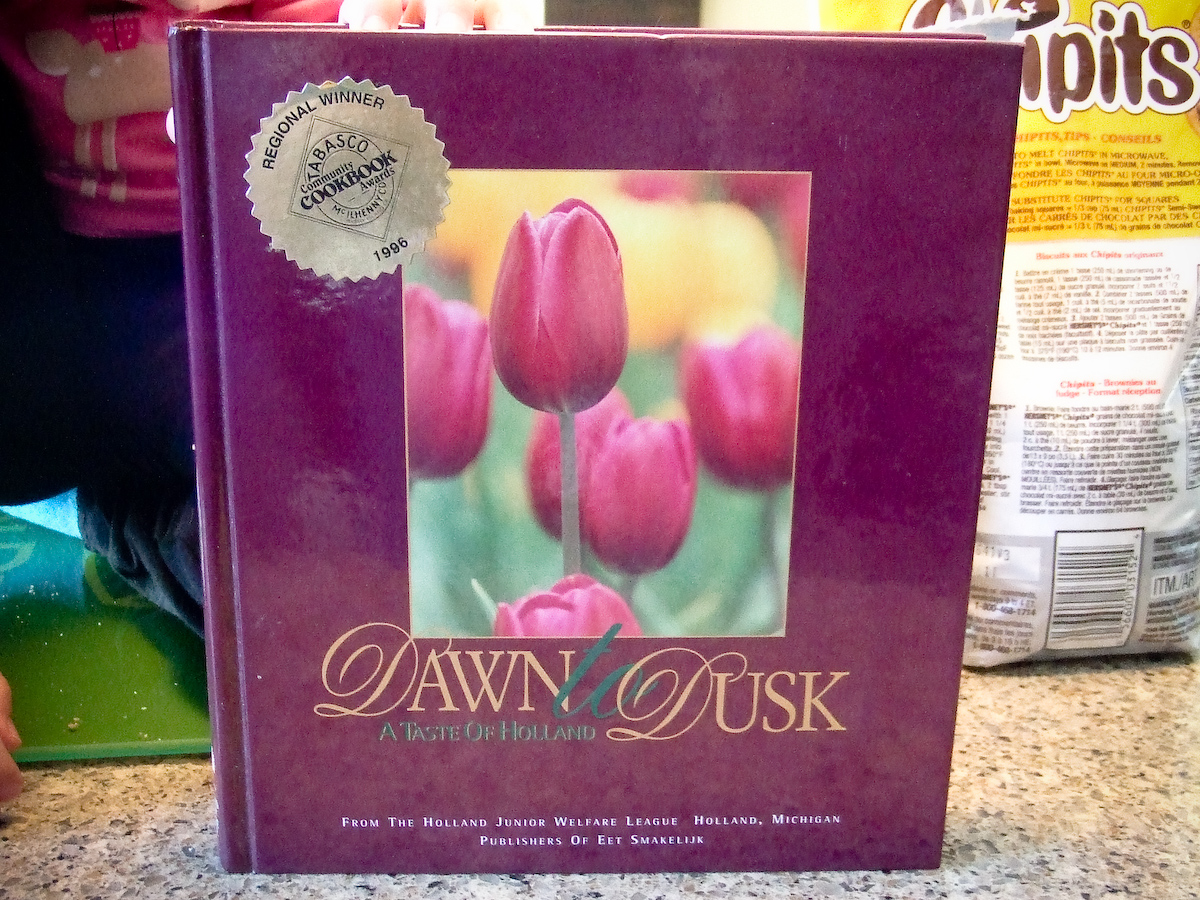
While we were there visiting the quaint little town of Zeeland, I bought a cookbook.  It is a bit of a tradition in my family to purchase a cookbook wherever your travels take you. 

Apparently, it's a good one.

Says so right here.  I didn't even know Tabasco had cookbook awards.  Or that one would be awarded to a cookbook featuring Dutch specialties.

The girl and I found this in the book.  A biscotti recipe in a Dutch cookbook.  Sounds about right.

Good thing, too.  The other day, I dared stop in a HomeSense.  Always a brew up for trouble.  A glass jar there began calling my name.  I resisted its lures and fled to my truck with my two youngest in tow.

Then my birthday came.  And I was given money.  And I went back for it.

And there she be. A thing of beauty.  Unlike so many other poor imitations, this one has an excellent rubber seal, making it not only pretty, but pretty functional, too.

So, lest this little number waste away from lack of use, I cracked open the cookbook and got started.  Why not start out by using a new recipe to fill a new vessel?


The recipe actually calls for unsweetened chocolate.  Semi-sweet is what I had so semi-sweet is what we used.

Now, I know I can melt chocolate and butter together in the microwave, but something just feels better about using the stove top.  Try to be patient and keep the heat low on your burner.  Chocolate and butter both burn very quickly.  This is especially important when using an electric element, since you can't immediately extinguish the heat source.

As a brief aside, can I nominate whomever was responsible for forming baking chocolate into neat little squares and wrapping it in the parchment?  Pure genius.  I love pre-measured ingredients.  Drastically cuts down on the amount of thinking I have to do in a day.

All nice and smooth and creamy.  Turn it off and let it cool a minute while you move on to the next part.

Three eggs and a cup of sugar with the handy dandy whisk attachment.

The recipe calls for whipping until light and frothy.  Since I've never made biscotti before, I guessed and figured this was about right.

Next, pour in the melted chocolate mixture.  By allowing it to cool before adding it, you've reduced your chances of curdling your eggs.  And increased your chances of making cookies instead of breakfast.  Turn on the machine and let'er rip.

Then the flour, salt, and baking powder into a separate bowl.  Buying baking powder in the larger container is more economical, but the stuff will lose its oomph if it gets old.  If you fear that may happen at your house, keep it in the freezer.  It will keep for as long as you need it in there.  Use a whisk to combine the dry ingredients.  This will have a lot of the same effect as using a sifter.

By now, the mixer concoction looks something like this.

Gently pour in the flour and let the machine slowly stir to combine all of the ingredients.

Once it is all combined, you will end up with a really heavy, thick batter.  With the nuts and chocolate chips still to be added, I switched to the paddle attachment to finish off the job.  This would mean extra dishes of course.

Not to worry, though.  I have people for that sort of thing.

This particular recipe calls for dividing the dough into three roughly equal sized batches, wrapping them in plastic wrap, and refrigerating for an hour.  This allows the melted butter to firm up.  Don't go too much longer than an hour.  You risk the butter becoming so hard again that the mixture is unworkable.  Then you'd have to let it warm up again and it would probably get too warm and then cool off and you would never get your cookies made.

After the mandatory chilling period, it looks roughly the same as it did when it went into the fridge.  Only colder. The experience has definitely changed it some.

The recipe very specifically calls for rolling these into 9" long logs, then pressing them down to a 2" thickness, and placing them precisely 3" apart on an ungreased baking sheet.  My helper measured to make sure I was doing it properly.  Not that she can actually read a ruler yet.  But we all felt more reassured.

Please note:  if you are baking these with boys in the house, bathroom humour will ensue.

Pop them into the oven at 350 F for 30 minutes or so.

When it comes out, the recipe dictates that you need to take the logs off the cookie tray and use a serrated knife to cut them on the diagonal, before placing them upright back on the baking sheet.  I actually found that cleaver worked really well, and I just cut them in place and spread them out to bake again.  And bake they did.  Another 20 minutes at 350 F.

And voila!  Double chocolate pecan biscotti from the Dutch cookbook.  The double baking leaves them almost dry and perfect for dunking in coffee or tea.

They will keep nicely in a beautiful airtight container like this one for a very long time.  Considerably longer than your average chocolate chip cookie.  Not that I really think that will be an issue here.  They also freeze exceptionally well.  If I were giving these as a gift, I may even consider dipping one end in melted chocolate.  You could also bake the entire batch as one large log to get few, but larger, cookies.  Just make sure the thickness is consistent at around the 2" mark.

Use your ruler if you have to. 1. 2.
Share/Save/Bookmark 3.

Wednesday, March 23, 2011

Gettin' The Gunk Off

Quick question - how many people still iron their clothes?  Anybody?  Anybody at all?  Come on, I know you're out there.

Second question - ever ironed something you shouldn't have?  You know, got distracted by a small child or some fascinating bit on television and accidentally ironed over your son's favourite Lightning McQueen shirt?  The one with the funny, plasticky decal on the front that doesn't do well in the dryer, let alone under your set to linen and don't ever change the temperature iron?  The one that caused your 5 year old to have a complete and total meltdown when he saw the end result and he tried not speaking to you for a week but it really only last a few minutes until his tummy started rumbling and you were again his best friend?  And that's a good thing, 'cause a few minutes was about all your mama's heart could take?

You haven't? Not even once?

OK, well then, I will just tell you what happens to me when I do something like that.  Not that it happens often.  'Cause it's not like there's anything around here that would cause a distraction.  Or a meltdown.

These little puppies truly are magic.  This one was free.  Can I get a hoo-yah?!?

This is what my poor iron looked like before Mr. Clean.  Actually, it looked even worse than this.  Not unlike straightening up the house before the cleaning lady comes, I may or may not have begun the cleaning process before taking this photo.

Performing this little miracle works best while the iron is still relatively warm.  I usually leave mine on the hottest setting for the majority of our ironing and need to leave the iron sit about 10 minutes to cool down enough to work with it.  The hotter the iron the better, but if it is too hot, you will melt the eraser and burn your fingers.  I actually melted the ends of my real finger nails once doing this.  True story.

And here we have the iron, post eraser.  Not perfect yet, but considerably better than where we started.  This is safe for both Teflon and stainless steel plates.  If you get really careful, you can even dig out around any of the holes that may have accumulated gunk.

Be sure to wipe the iron plate off with a clean, wet cloth before ironing again.  If all of the stubborn ick doesn't come off the first time, don't despair.  Give it another scrub the next the time iron is hot.  Or let the iron heat up and have a go at it again.  Either way, you will have saved your iron and will not be able to iron your crisp white blouse again without fear of transferring whatever the mystery substance is from your iron onto it, thus forcing you to go shopping and purchase a new blouse and the cute shoes that were just calling your name and the matching earrings that were too good of a deal to pass up.

Unless that is your goal.  In which case, ignore this post all together.

For those of us who void the mall like a steer avoids a butcher shop, your iron can now live to press on to infinity...and beyond. 1. 2.
Share/Save/Bookmark 3.