Google Friend Connect

Search This Blog

Showing posts with label sewing. Show all posts

Tuesday, March 1, 2011

The End of the Thread

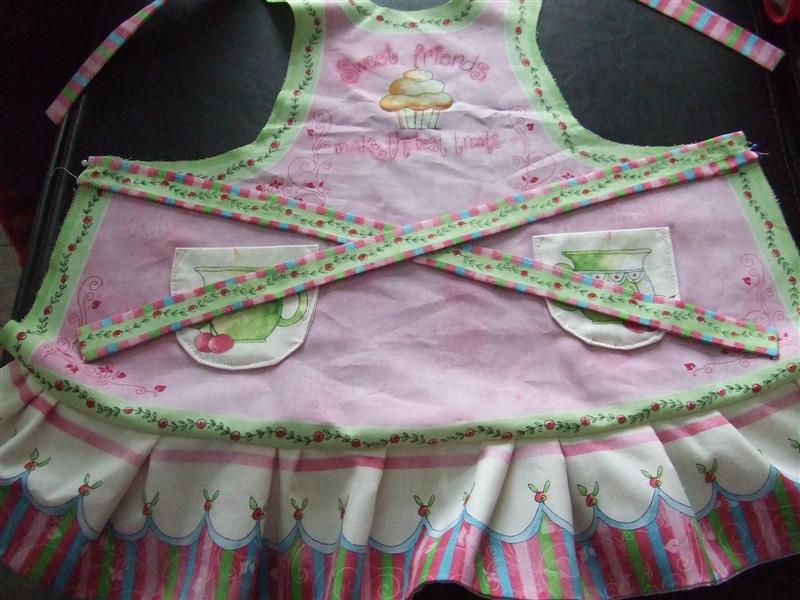
And the apron saga is finally reached its finale.

Can I get a Hallelujah?

And a huge sigh of relief.

The last missing tidbit was the cutesie little cupcakes I decided to go ahead and make to go along with the apron.
Cupcakes are, after all, just little pieces of cake, right?  Wrong.

Essentially, I must sew these little pieces together, inside out, then turn them right side out through a teeny little hold, and put stuffing on their inside through said same little hole.  What was I thinking?

This actually took more thought on my part than it probably should have.  I actually woke up with an epiphany about this particular sewing dilemma a few days ago.

Don't ask.  Obviously my life needs a little excitement.  And perhaps I need to get out a bit more.

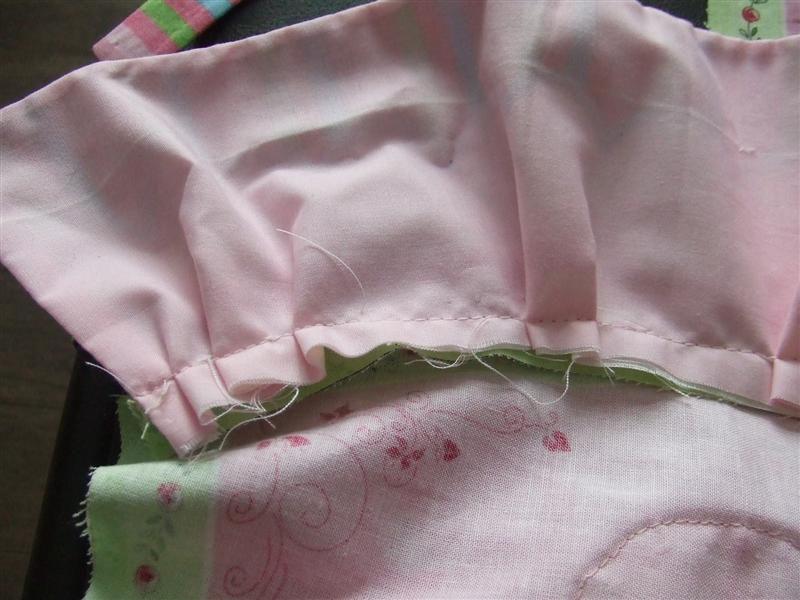
At any rate, the above method did not work.

This method did work.  Very well, in fact.  Note to self:  do not attempt to skip the gathering stitch.

That old gathering stitch.  It will get you every time.  Essentially, hand stitch a very loosey goosey stitch around the outside edge of the cupcake top and then pull until it is tightened up to about the same diameter as the cupcake bottom, and then stuff it inside.  Then proceed to machine stitch around the outside.

Got that?  Good.

Repeat three times to complete all three cupcakes.

And there you have it.  After you turn it right side out through a teensy little hold, you then proceed to stuff fibrefill back through that same teensy little hole.

See that hole?  Yah, that's the one.  Then you need your wonderful Heat 'n' Bond to be snipped to size and ironed on.

I haven't done that part yet.  That's why I can still type this.  My finger flesh hasn't been melded to the cupcakes.

So there you have it.  Lovely, non-edible, vaguely functional cupcakes for my girl.  That have been finished several days after her birthday.  And whose greatest purpose is to occupy more space in our living room.

And, of course, more space in my girl's heart.  And that's all the reason I ever really needed.
1. 2.
Share/Save/Bookmark 3.

Friday, February 25, 2011

The Apron Saga - Part Deux

It is finished!

At least the apron part.  And with several hours to spare, I might add.  E2's birthday isn't until tomorrow, you know.

The apron saga has not actually been too bad, so far.  I'm pretty impressed with myself.

Once I conceded that I would just have to hand gather the ruffle, things were rolling right along.

The ruffles actually turned out pretty even, too.

The pockets, however?  They took minutes off my life.  Maybe even an hour.

What I thought was a fairly smooth and even rounded edge wasn't so much so.  At least once I turned the pockets right side out.

This stuff here is a life saver.  Snip off a piece of this tape-like stuff, iron it down, peel off the paper, stick the second piece of fabric to it, and poof!  A forever seal.

After spending agonizing, grueling minutes attempting to perfectly align the non-uniform pockets, I again deviated from the instructions  Shocking, I know.  I had the audacity to machine stitch the pockets right onto the front panel of the apron, instead of the baste stitch it calls for after the whole thing is put together.

Next, I had to mentally wrap my head around where the neck and waist ties would need to be on the finished product, so I could figure out where to place them on the unfinished product.  Got that?

Looks a bit interesting right now.

Then for the pretty pink lining.  We are getting close.

Pins.  Lots and lots of pins.  Except I put them on the wrong side, which made sewing just a leetle bit tricky.

Now it is time to snip!  But carefully, lest I undo my hard work.

It is important to make these little snips anywhere there is a rounded edge to be turned.  Otherwise it bunches and puckers and just looks messy.  And who wants a messy apron?  Hmm?

Square corners also need to be trimmed on a 45 degree angle.  This will ensure nice, sharp corners.  Once you use your seam ripper and paper boner to poke out the corners.  Try to avoid bleeding on your almost finished project.  It will make you cry.

Once it's folded right side out, time for a leetle trip to Mr. Iron, where we'll press under a hem.

Nice and even all over.  Ready to be stitched!

And - ta da!  A lovely little apron for my lovely little girl.

 Here we have the back of the ruffle, all nice and neat.

 And the, er, pockets.  Which, in hindsight, I sewed on backwards.  The cup handles probably should have been to the inside.  On the plus side, I did remember to do the little triangle stitch thingy in the corner.  This builds a stronger pocket. Something that will certainly come in handy when carrying around ponies.
 The bottom front of the ruffle is just a tad uneven.  This is what homemade is all about.  Or at least, this is what I tell myself.
But the neckline is nice and smooth.  Look at it, a snipped piece of perfect.  Say that three times fast.

And there we have it.  And now, off to wrap a couple of Lalaloopsy dollies and a Barbie shirt.  Heck, I've got a few hours to spare.  Why rush it?
1. 2.
Share/Save/Bookmark 3.

Wednesday, February 23, 2011

Progress Thus Far...

If I were even the teensiest bit wise, I would have started this project back when I originally bought E2 this fabric.  As in, back before Christmas.

If I were even a little bit smarter than that, I wouldn't have undertaken this project to begin with.

But how does one say no to a little blonde haired, blue eyed angel who looks in awe at the sample hanging on the wall and then comes up with one liners like "I love to go to the fabric store with you mommy.  There are so many pretty things there.  Then you take some thread and make me beautiful things."  Seriously.  Here's hoping I grow more of a spine by the time she discovers electronics.

Or automobiles.

Or horses.  Let's not even go THERE.

And so we begin with this cute little number, and use it as a guide to cut a lining.

You can see why my pink-loving, Cupcake Wars watching little girl fell in love with this particular model.

Again, simple directions.  Remember who we're talking about here.

These pretty little strips of cloth will become waist and neck ties.

 Like this.  Don't worry, Real Sewers!  I will press them.  But after the hour or so it took me to turn these little puppies, my fingers needed a break.  And some Ibuprofen.

I've decided to step outside the instructions here and line the ruffle.  Oh my.  Here I go again, gittin' all
crazy 'n' stuff.

Note:  for those of you who actually sew, I realize I do not have my fabric sufficiently ironed.  Not even close.  I also realize that I am not sewing for a runway model and thus, am perfectly OK with that.

Pins, pins everywhere!  Only 1/2 a pint of blood loss this time.  Hooray for me!

See?  All nicely stitched, turned, and pressed.  Only thing I've used the seam ripper for is to pull out the corners.  Progress!

 After a couple of quick calls and e-mailed photos to my lifeline, I abandoned ship on getting Old Faithful to put a gathering thread in the ruffle and ended up doing it by hand.  Very minimal blood loss here.

Now see these little pieces (kindly ignore the groady, ironing board background, it's been with me a long, long time)?  They will become cupcakes.  Yah, right.

You take the bottom and force fit it to the sides to create the cupcake 'wrapper'.  Right now, looks like some kind of alien.  Or maybe one of those weird, middle of the store change tents at Old Navy.  The one where busy mothers with little ones constantly try to convince themselves is a better alternative to use than the 'real' change rooms.  And then they and their underwear get exposed to the world when their toddler starts playing peek-a-boo with the world.

Not that I have any first hand knowledge of this type of situation.

They kind of end up looking like this.  And as if there wasn't enough blood loss already...

I now need to make these circles fit onto these bases.  Upside down and inside out first.  Um, sure.

I'll keep you updated on my blood donation.
1. 2.
Share/Save/Bookmark 3.

Monday, February 21, 2011

Tools of the Trade

My Princess will turn four on Saturday. (What?!?)  I do not even think this is possible.  She's still two, I firmly believe.  Following her big brother around, driving him nuts by getting into everything he is doing and inevitably breaking it.  Pointing at the things she wants because she hasn't yet fully mastered her language skills.  Wearing odd combinations of clothing because she dances to her own fashion drummer.  Heck, she dances everywhere she goes.

Never mind.  Most of that is still true.

Except the lack of mastery of the English language.  She's got that down pat.  And then some.

Must be her father's kid, I tell you.

Lord willing, this year, we are not going to

A.  Move cities
B.  Move houses.
C.  Move jobs.

I will plant flowers and actually be here to see them grow.  They will not be planted for someone else's benefit.  We will finish this house (eventually) to our liking, not with a continual eye towards re-sale value.

At any rate, I have decided this year, we will attempt to plan out events and do them well.  Not haphazardly throw together birthdays, anniversaries, or other events because we are busy with other, more pressing matters.

To that end, I have decided to make my girl some of her birthday present.  Oh dear.  What was I thinking.

I theory, this is what it will turn out to be:
A pretty little apron with cupcakes on it.  I decided - what the heck! - I'll make the cute little play kitchen-sized cupcakes that come with it!  Why not?  How hard can it be.  Yah, right.

To do this, I have enlisted a few trusty companions.

This sewing machine.

This was my mother's.  She bought it before I was born.  I think she may have even bought it before she married my father.  This makes this little gem almost 40 years old.  I hear the Smithsonian calling now.  Sorry, boys, she's not for sale!

It's a simple machine.  But don't let that fool you.  It has a lot of features.  It will actually double needle stitch.  You can (or at least used to) be able to get a ruffler attachment.  It can be used for embroidery, button holes, you name it.  And clearly, it has stood the test of time.  It was with me through university, one apartment, five homes, and three different cities.  And no, those certainly weren't all professional movers.

I like to flip through the instruction manual once in a while, just to remember a time before on-line registrations and 500 digit serial numbers.  And before every instruction manual had to be printed in 500 languages to help avoid law suits.

Model 656.  Simple.  Clean.  Easy to remember.

Remember these?  The little cards you cracked out of the instruction manual and mailed off with a 35 cent stamp?  No PO Box here either.  The company wasn't afraid to be found, because clearly, they made a product they could be proud of.  And they were located on this continent.


No mention of an e-mail address here yours or theirs..  Online registration?  Not even a thought.
Even the part the dealer was supposed to keep was simple.  No DNA testing to prove it was you who bought it.  Heck, the dealer probably knew you by name. Probably knew your mother and grandmother, too.

Simple, simple directions.  Clearly, a useful tool that has not even yet outlived it's usefulness.


And this?  Clearly not my sewing machine.  Rather, my pretty little rows of thread.  Lined up on the peg board my dad made for my mother several years ago.  Until she outgrew it and passed it on to me.


And let us not forget the vital role this little puppy plays...

And last, but not least, my life line.  For calling home to Ma - seamstress extraordinaire.  For those days when this girl gets in just a little bit over her head.
1. 2.
Share/Save/Bookmark 3.